
This is the ribbon I chose - I didn't end up using the buttons. Maybe next time.

You should have two strips in both materials for the sides and the handle. If you are taller, you may want the handle to be longer than 40 inches.
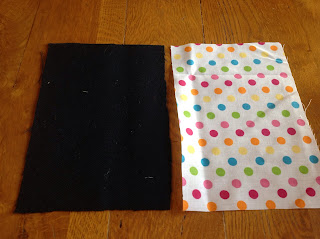
This will form the front of the bag.
You now need to make the inner and outer separately. Pin the front section to the thin strip. You will have some excess material which you will need to trim off after sewing.

You will see that I've also pinned the ribbon in place - sew this on before sewing on the thin strip. After sewing the pieces together, trim around the bottom so the corner is rounded.

Now pin the back piece to the other side of the thin strip and sew together.

Sew the second piece of ribbon to the top of the larger rectangle. When you have done the same to both of the bag sections, sew the other two thin strips together, right sides facing each other then turn right way and press flat.

Now comes the tricky part. Turn the thinner cotton right side out. Place the handle with inside the thicker material bag section with the same material facing itself and pin into place. Put the inner inside and pin together. It should start to look more like a bag now. When you sew the pieces together, make sure you leave a small section so that you will be able to turn it right way out.


Go over the handle section three times as this will be where the greatest strain will be when you use the bag. When you've finished sewing, press the bag and then close the hole left. Here is the finished bag. I also added an inside pocket as an extra.


Now I'm off out with my new bag. Hope you all have a great day.
This is an awesome tutorial! The bag is lovely :-)
ReplyDeleteSo cute bag!!!Great tutorial!
ReplyDeletegreatings from Greece+++
http://freestilcreatingbyvilly.blogspot.gr/
Looks great! I like your fabric choices. Thanks so much for linking at Shine on Fridays this week!
ReplyDeleteSo cute! I love the colors. Thanks for sharing at Pinworthy Projects.
ReplyDelete